How to Build a Adobe Express Add-On?

So you want to build an Adobe Express add-on. This is how you do it. We’ll make an AI color palette generator that takes prompts and creates color schemes. Nothing fancy, just the basics.
What We’re Building
An add-on where users type something like “sunset colors” and get AI-generated palettes they can add to their Express projects. Basic stuff.
Prerequisites
You need these things:
Node.js (version 18 or newer) — get it from nodejs.org
An Adobe account — use your existing one or make a free one
Basic React and TypeScript knowledge (cuz we’re going to use react-typescript template), just the basics
A text editor, VS Code, Cursor works fine
Step 1: Setting Up Your Project
Create your add-on project with this command:
npx @adobe/create-ccweb-add-on color-ai-addon - template react-typescript-with-document-sandboxThis creates a new folder with all the files you need. It includes document sandbox support so you can actually add things to the Express document.
Navigate into your project:
cd color-ai-addonStep 2: Understanding the Project Structure
Here’s what gets created:
color-ai-addon/
 ├── package.json - project config
 ├── webpack.config.js - build settings
 ├── tsconfig.json - TypeScript config
 ├── src/
 │ ├── index.html - main UI file
 │ ├── manifest.json - add-on metadata
 │ ├── components/
 │ │ └── App.tsx - main React component
 │ └── sandbox/
 │ └── code.js - document manipulation logicb
Adobe Express add-ons have two main parts:
UI part (React components) — what users see and interact with
Sandbox part — where you actually add stuff to the document
Step 3: How Add-Ons Work
Adobe Express add-ons have two main parts that talk to each other.
UI part (React components):
This is what users see and click on.
Runs in an iframe inside Express.
Uses React with TypeScript for the interface.
Handles user interactions like buttons and forms.
Sandbox part (document manipulation):
This is where you actually change the Express document.
Runs in a separate context for security.
Can create shapes, text, colors, etc.
Communicates with the UI part through a proxy.
The two parts talk to each other using the Add-On SDK. The UI sends messages to the sandbox when users do things, and the sandbox does the actual work.
Step 4: React TypeScript Setup
The React-TypeScript template gives you:
React 18 — for building the UI
TypeScript — for type safety
Webpack — for bundling everything
Spectrum Web Components — for UI that looks like Adobe Express
Hot reload — so changes show up immediately
You get a basic App.tsx component that you can modify. It already has the Add-On SDK set up and ready to use.
Step 5: Spectrum Web Components
Adobe uses Spectrum Web Components for the UI. These are web components that look like native Adobe Express elements. You can use them in React with the @swc-react packages.
Common components you’ll use:
Button — for clickable buttons
TextField — for text input
Theme — wraps everything to look like Express
ProgressCircle — for loading states
Step 6: Document Sandbox APIs
The sandbox part has access to the Express document APIs. You can:
Create shapes (rectangles, circles, etc.)
Add text with different fonts and styles
Change colors and fills
Group elements together
Position things on the artboard
The main APIs you’ll use:
editor.createRectangle()— makes a rectangleeditor.createText()— makes textcolorUtils.fromHex()— converts hex colors (imported separately from “express-document-sdk”)editor.context.insertionParent— gets where to add things
Import pattern:
import { editor, colorUtils } from "express-document-sdk";Step 7: Communication Between UI and Sandbox
The UI and sandbox talk through a proxy system:
UI calls sandboxProxy.someFunction()
This sends a message to the sandbox
Sandbox runs the function and returns data
UI gets the result and updates the interface
This is how you get user input from the UI and then actually add things to the Express document.
For external API calls:
The sandbox cannot make network requests directly. You need to:
Make the API call from the UI iframe (where fetch is available).
Expose a function from the UI that handles the API call.
Call that function from the sandbox through the communication API.
Pass the results back to the sandbox.
Step 8: Building and Testing
To build your add-on:
npm run build
npm run start
This creates a local server https://localhost:5241 where you can test your add-on.
Step 9: Loading in Adobe Express
To test your add-on:
Go to adobe express (https://new.express.adobe.com)
Enable developer mode in settings
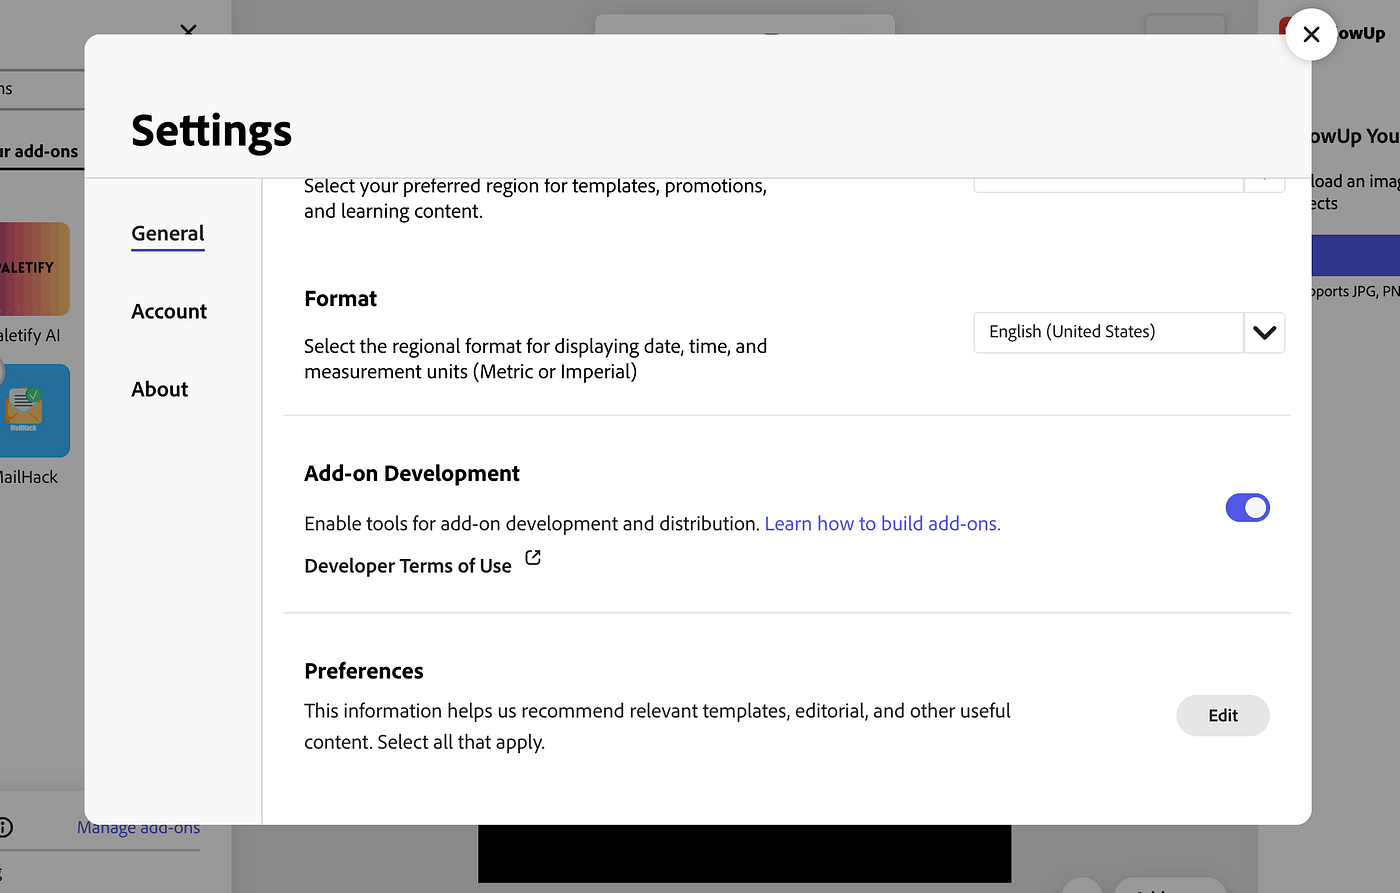
3. Create a new project
4. Go to the Add-Ons panel
5. Enable “Add-On Testing”

6. Enter your local server URL
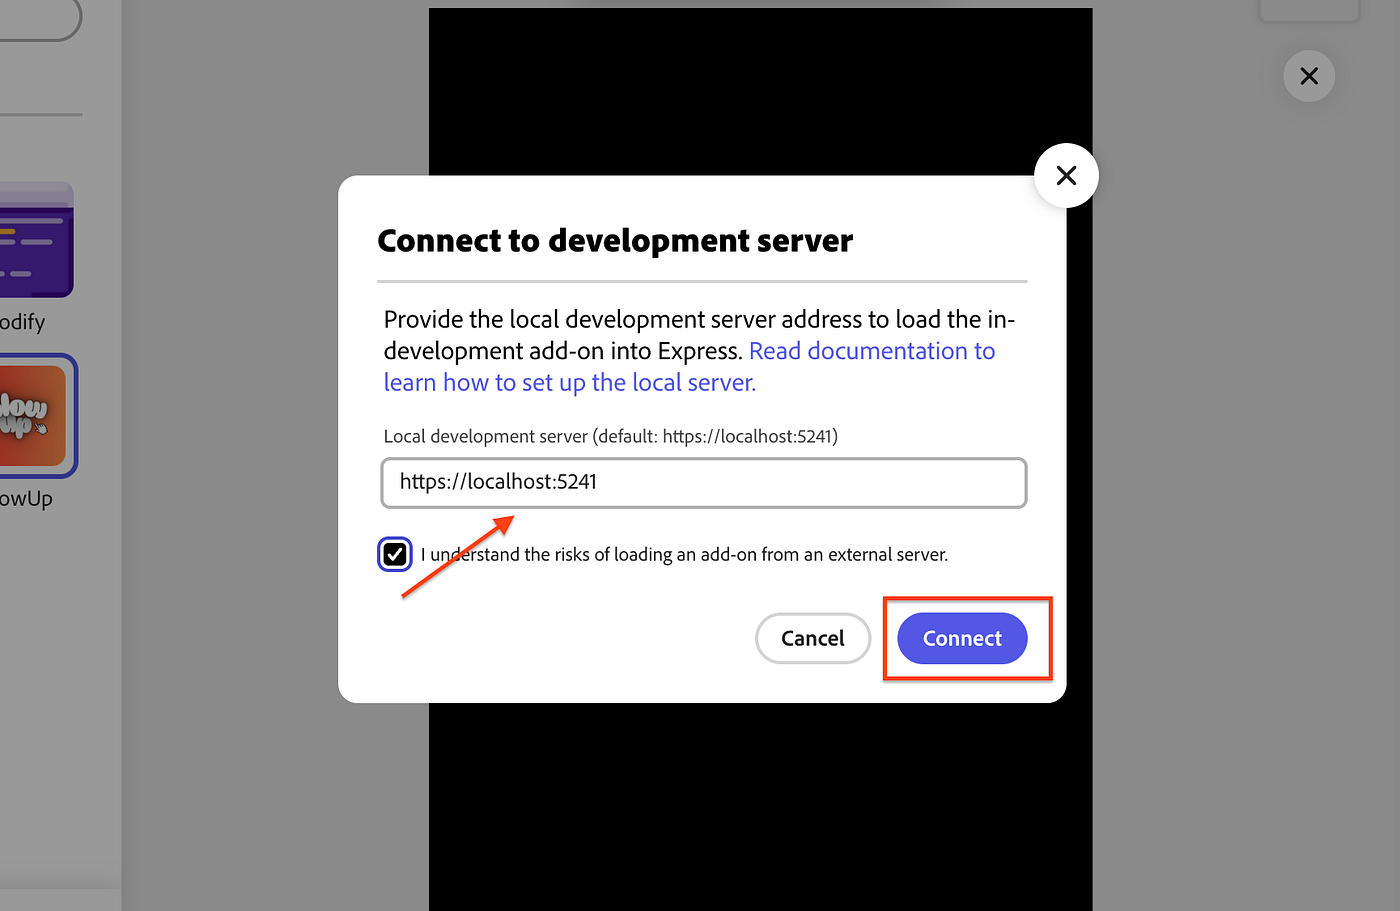
7. Click your add-on to run it
Step 10: How the Color Palette Add-On Works
For our color palette generator:
User types a prompt in the UI.
UI calls the Gemini API to generate colors.
UI sends the colors to the sandbox.
UI shows the color swatches.
When the user clicks “Add to Document”, the UI tells the sandbox to create rectangles with those colors.
Sandbox creates the rectangles and adds them to the Express document.
Important note: The document sandbox has limited web APIs and cannot make external network requests like calling APIs. External calls must be made from the UI iframe and the results passed to the sandbox through the communication API.
Common Issues
Add-on won’t load:
Check that your local server is running.
Look at the browser console for errors.
Make sure manifest.json is valid.
API calls fail:
Check your API keys.
Look at the network tab for failed requests.
Make sure you’re handling errors properly.
Things don’t appear in the document:
Make sure you’re in a project with an artboard.
Check the sandbox console for errors.
Verify you’re calling the right APIs.
What You Learned
You now know:
How Adobe Express add-ons are structured.
The difference between UI and sandbox parts.
How to use React and TypeScript for add-ons.
How to communicate between UI and the sandbox.
How to add things to Express documents.
How to test add-ons locally.
This is the basic structure for any Adobe Express add-on. You can build whatever you want using these same patterns.
If you guys want, I can also come up with a blog where we will deep dive into how to actually write Add-On code, this blog was just for you to get introduced with how Add-On works.
See you in the next one!!
Follow me on x dot com: https://x.com/fardeentwt